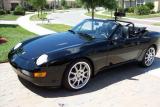
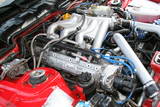
Here are the results of the HC charge and a few tips
1. Get a spray bottle (old windex etc) and make a soapy water solution like you would use to blow bubbles. You will use this as a leak detector by spraying a little on each coupling after you fill the first bottle of R12a. It works really well to find leaks. Get your 19 and 22mm open end wrenches ready too. In fact, it might be a good idea to go around all the AC lines and just snug the fittings up a little before you start charging the system.
2. The LOW PRESSURE valve is mounted on the compressor on the 968 – you charge the system from this location, so you need to raise the front of the car on jackstands and remove some of the shrouds to gain good access. I just removed the front batwing (front apron) under the nose.
a. Clean the area around the valve – I used a shot of brake cleaner and let it all dry before starting the charge
3. I called Enviro Safe and they said there is no need to pull a vacuum at all in using the HC based EnviroSafe R12a coolant. The HC coolant is compatible with old R12 and R134a and mineral or ester oil, so there is no need to pull all the old oil and coolant out. Just make sure there is oil in the system.
4. The 968 takes 3.3 oz of oil and 313 gms or 11.1 oz of R12a – the charge bottles come in 6oz refrigerant and 5 oz refrigerant with dye which makes for almost the perfect amount.
a. Good idea to use the 5oz can with Dye to co a quick leak check
b. Detaching the charge hose results in a little of the gas escaping, so 2 x 6oz would probably be OK
5. If you need to add oil to the system (if it was completely emptied by a vacuum pull before like mine was) add this first to the LOW PRESSURE (under the car on the compressor fitting).
6. With engine off, and NO vacuum, attach the can with the dye first to the LOW PRESSURE and then proceed to fill until the can is empty. Only takes about 20 seconds to empty the pressurized can. I used a triple beam chemist balance to weigh the before and after to get an idea of the contents in the can – the weight indicated on the can is very accurate.
7. before you add another bottle – and with the engine still off – take the soapy water spray and go over each AC line connection in the engine bay again. Pay special attention to the line connections at the Receiver Drier and the 19 & 22 mm connections to the Condenser (the smaller black radiator right at the front behind the grill). I had a small leak there from a loose fitting – sealed up nicely with a turn with a 19mm. If you have any bubbles, or hear hissing sounds – STOP adding anything more. There is a leak in the system that must be repaired before you can recharge the system any further. Most common problem is a bad AC line (cracks, etc.) or bad “O” rings somewhere. I bought a AC “O” ring kit off eBay for $15 / 270 pcs and I wish I had this before I swapped a compressor on my son’s 944 last week. Just 8 Porsche “O” rings cost me $10 and I still had to go out to source a few more during that retrofit! So it’s handy to have a few extra sizes around before you start.
8. If there are no leaks, then with the first can in the car, get the 2nd can ready to fill the system and proceed to fill. Make sure you are connected to the LOW PRESSURE (under the car on the compressor fitting). The high pressure side can reach up to 150psi which is definitely NOT the place you want to connect to with a thin metal can full liquefied gas.
9. When you are sure everything is connected right, start up the car (careful as it will be up on jackstands still), then turn the FAN to MAX, the temp dial to COLD and hit the AC switch – you should hear the compressor kick in, the idle speed drop a little and with the R12a can held upside down, crack open the valve and the contents should be “sucked” into the system by the Low Pressure side. The engine should be running all the time during this process. Adjust the AC controls in the car so that you get a blast out of the centre dash vents.
10. Back in the car, the temperature should start to drop noticeably and if you have a thermometer in the center vents, the temps should drop below 40F and maybe even lower depending on the outside temps and humidity. After about 60 seconds, the AC should be pumping ice cold air and operating as it came from the factory. Take a look into the little round window in the “sight glass” and you should see a “river” of activity with the AC on – a stream of clear liquid (the oil and coolant) or maybe just a little foamy solution. With the AC off, it should just be clear.
11. In the 968, I started to get cold air even with the first 5 oz bottle of Enviro-Safe R12a – and after adding the 6oz bottle, it was very cold again. I’ll post some temp readings out of the dash vents when I get hold of a thermometer. But it works again and it blows COLD.
12. Pretty easy to do, only $40 or so from eBay (better kit than from the mfg actually – more R12a, better hose with gauge, thermometer and leak detect LED light included).
CAVEATS – make sure you connect to the LOW PRESSURE fitting. The can could possibly explode if connected to the high pressure side next to the receiver dryer and that could lead to serious injury.
Only do this if you are comfortable handling the AC gases – there will be a little escape of fumes when you disconnect the charge hose each time and even change the bottles of gas – you will get a little nauseous – the R12a does contain propane and other gases so be careful. I would certainly NOT do this in a closed garage. I opened all the windows, the garage doors, and still got a little sick from the fumes.
Tidy everything up, lower the car, and drive off in cool comfort!
Here’s a supplier on eBay with a good price on the kits. I’m going to get another one as it is pretty cheap to have around during the summer and this kit comes with all the right stuff you need.
http://cgi.ebay.com/...sspagename=WDVW





 View Garage